今まではdump1090とfr24feedをつかってFR24へフィードしていたのですが,軍用機が見えないのと自分が役に立っているのかどうかサッパリ分からなくて面白くないので独立系?へ乗り換えることにしました。
なお,下準備については下記記事を参考にしてください。

ModeSDeco2
変えるついでにdump1090からModeSDeco2に変えてみました。
AIS用に使っているAiSDeco2もこのxdeco.orgさんが開発したもので,シンプルですが優秀だと思います。
導入手順
導入や使い方については下記サイトを参考にしました。


mkdir modesdeco
cd ~/modesdeco
wget "https://drive.google.com/uc?export=download&id=1WhheW-I4_1sb3VUXa9bcs8XEkh9fn_Lh" -O modesdeco2.tgz
tar -xzvf modesdeco2.tgz
で大丈夫なはずです。
ディレクトリ名のmodesdecoや保存名のmodesdeco2.tgzは任意なものなので好きに名付けてください。
使い方
このソフトのオプションは
  -h [ --help ]             This help message
  --device-list             List available devices
  --device-index arg        Select RTL device (default: 0)
  --device-serial arg       Select RTL device by serial number
  --gain arg                Set Gain in RTL Receiver chip, dB (default: auto)
  --agc                     Enable Automatic Gain Control in RTL2832 chip (default: off)
  --freq-correction arg     Set RTL frequency correction, ppm (default: 0)
  --airspy                  Select AirSpy device
  --airspy-sn arg           Select AirSpy device by serial number
  --airspy-lna arg          Set LNA gain in AirSpy Receiver chip (default: 15)
  --airspy-mixer arg        Set Mixer gain in AirSpy Receiver chip (default: 15)
  --airspy-sr arg           Set AirSpy sample rate (default: max available) Example: 4, 6, 10
  --airspy-rfbias           Enable AirSpy RF Bias (default: off)
  --airspy-if arg           Set IF gain in AirSpy Receiver chip (default: 13)
  --airspy-workers arg      Set Airspy decoding worker threads (default: 1)
  --airspy-decimation arg   Set Airspy decoding decimation factor (default: 1)
  --airspy-fecbits arg      Forward Error Correction (FEC) bits (0..2) (default: 1)
  --airspy-linearity arg    Select Airspy linearity gains (0..21)
  --airspy-crc-valid        Select only CRC valid frames (default: off)
  --disable-correction      Disable correction of corrupted signals (Default: on)
  --input-file arg          Set input filename with I/Q signals
                            Format: type:filename (type: rtl,airspy10,airspy6)
  --rbs                     Enable RBS decoding (default: off) - for RTL devices only
  --beast arg               Enable BEAST output listen port (default: off)
  --avr arg                 Enable AVR output listen port (default: off)
  --avrmlat arg             Enable AVR MLAT output listen port (default: off)
  --avrmlatas arg           Enable AVR MLAT AirSpy output listen port (default: off)
  --sbs10001 arg            Enable SBS-3 output listen port (default: off)
  --msg arg                 Enable MSG output listen port (default: off)
  --web arg                 Enable Web Server on port (default: off)
  --google-key arg          Google Maps key
  --web-auth arg            Enable web auth username:password (default: off)
  --disable-web-log         Disable Web Log (default: on)
  --silhouettes arg         Set Silhouettes directory
  --pictures arg            Set Aircraft Pictures directory
  --db arg                  Set BaseStation DB Filename
  --frdb arg                Set FlightRoute DB Filename
  --location arg            Receiver location Lat:Lon Example: 36.27:-15.89
  --add-reference-point arg Add a new reference point for calculating distance and azimuth to the map Example: 38.5:-12.6:[Label1]
  --add-points arg          Add additional points (single or list) with coordinates to the map Example: 36.2:-15.3:[Label1] [38.5:-12.6:[Label1]] ...
  --verbose                 Verbose mode (default: off)
  --localtime               Local Time in MSG format output (default: UTC)
  --filter-expire arg       Filter record expire time, sec (default: 20)
  --filter-count arg        Filter record min count (default: 6)
  --filter-time arg         filter record min time, sec (default: 60)
  --filter-nocountry        Disable ICAO Country check filter (default: on)
  --filter-ic               Enable Interrogator Code suppression filter (default: off)
  --filter-nodup            Disable Duplicate filter (default: on)
  --flight-expire-time arg  Flight expire time, sec (default: 3600)
  --nmea arg                Enable GPS Emulation. Format: ICAO:Port:BaudRate
  --nmea-logfile arg        Set GPS Emulator logfile
  --metric                  Switch to metric system of distance measurement (default: imperial)
こんな感じでたくさんありますが,先ほどのサイトなどを参考にして必要なものを設定しましょう。
私は上記サイトの例ほとんどそのままにしました。
cd ~/modesdeco
./modesdeco2 --gain 49.6 --sbs10001 10001 --avrmlat 30002 --beast 30005 --rbs --msg 30003 --location 35.xxxx:139.xxxx --web 8081 --device-index 0
上記コマンドでピコピコ画面が動き出したら上手くいっていると思います。
LAN内のPCブラウザから
http://192.168.**.**:8081/(192.168.**.**はラズパイのIP,8081は上記オプション–webで設定した数値)
と打てば下記のような画面が開くはず。

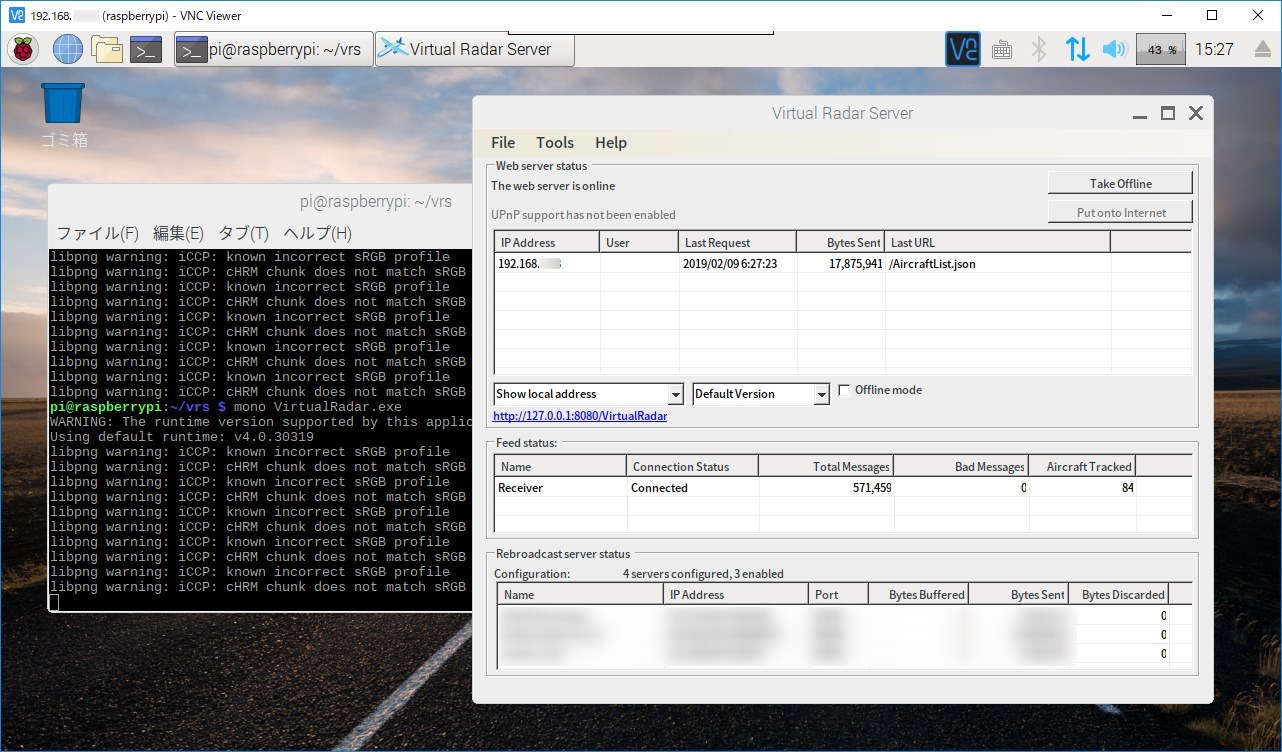
Virtual Radar Server
他の人へ自分のデータをフィードしたり,他の人からフィードしてもらったりするのに,このVirtual Radar Server(以下VRS)というのがあるととても便利です。
導入
導入等については下記サイトを参照しました。

ラズパイではMono上で動作するらしいので,Monoを導入します。
Monoのインストール

公式サイトの

へインストール手順が書いてあるのでそのまま実行しました。
私のラズパイはRaspbian9なので下記のとおりですが,Raspbian8だと少し違うようです。
sudo apt install apt-transport-https dirmngr
sudo apt-key adv --keyserver hkp://keyserver.ubuntu.com:80 --recv-keys 3FA7E0328081BFF6A14DA29AA6A19B38D3D831EF
echo "deb https://download.mono-project.com/repo/debian stable-raspbianstretch main" | sudo tee /etc/apt/sources.list.d/mono-official-stable.list
sudo apt update
までが下準備で,ここまでできたら
sudo apt install mono-devel
でインストールされます。
30分近くかかります。
VRSのインストール
公式サイトからwgetでダウンロードしましょう。

mkdir vrs
cd ~/vrs
wget http://www.virtualradarserver.co.uk/Files/VirtualRadar.tar.gz
tar -zxvf VirtualRadar.tar.gz
フォルダ名はここではvrsとしましたが,任意なので好きなものにしてください
この状態で起動するとエラーになるので,さらにファイルを追加します。
先ほどのディレクトリから
wget http://www.virtualradarserver.co.uk/Files/VirtualRadar.exe.config.tar.gz
tar -xvf VirtualRadar.exe.config.tar.gz
このファイルは.tar.gzとなっているのですが実際は.tarファイルなので,-zxvfで解凍しようとすると怒られるので,-xvfで解凍してください。
これで大丈夫なはずなので,GUI上からコマンドラインで
mono VirtualRadar.exe
で起動します。けっこう重いです。
VRSの設定
ToolsからOptionを選びます。(画面は都合によりWindows版なのですが,Linux版もほぼ一緒です)

Receiverを選びます。
USBドングルを利用したSDRの場合,基本的にFormatは「AVR or ~」を選んで,あとはラズパイのIPとポートを選ぶだけです。
よく分からない場合は,右上にウィザードボタンがあるのでそれでやると間違えなくていいと思います。

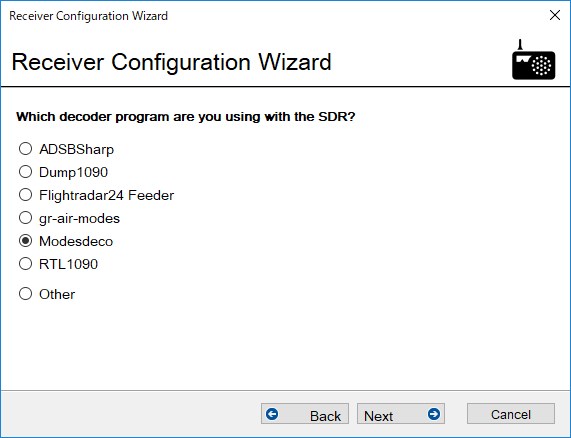
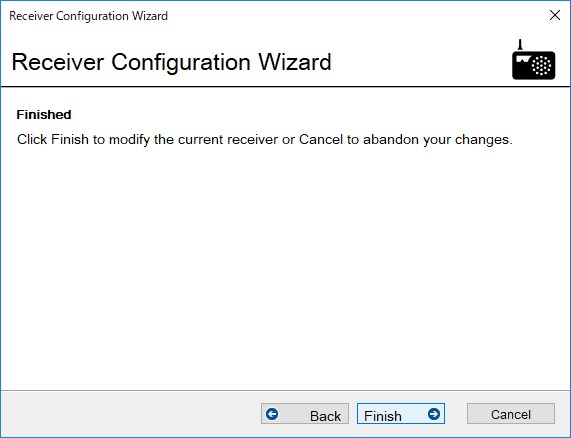
ウィザードを選択すると下記画面になります。
今回の例ですと,USBドングルを差してModeSDeco2を作動させているので,「A software defined radio」を選択。

「Modesdeco」を選択
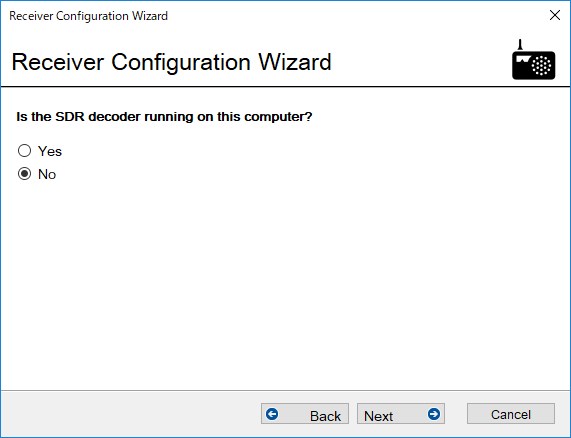
ネットワークで動作させるのでNoで。
ラズパイのIPを入力します。
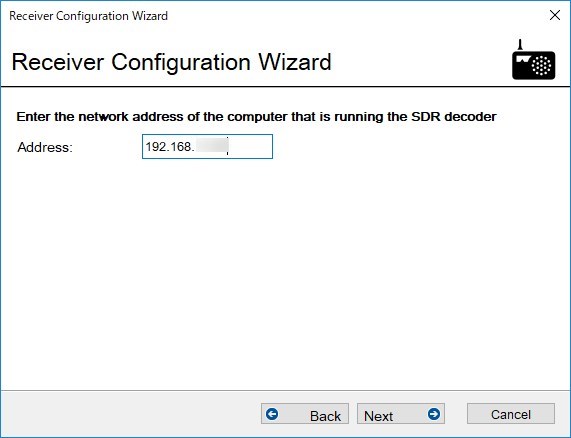
完了。
他にもいろいろと設定項目はありますが,最低限動かす場合はこれでOKです。
動作確認
これで最初の画面に戻ると「Feed status」の「Total Messages」の数字が増え始めているはずです。
設定が問題ないときでもなぜか動作しないときもあるので,そのときはいったんVRSを再起動しましょう。
それでも上手くいかないときは何かしら設定が間違っているのだと思われます。
ポート番号とかをよく確認しましょう。
http://127.0.0.1/VirtualRadar
をブラウザで開くと
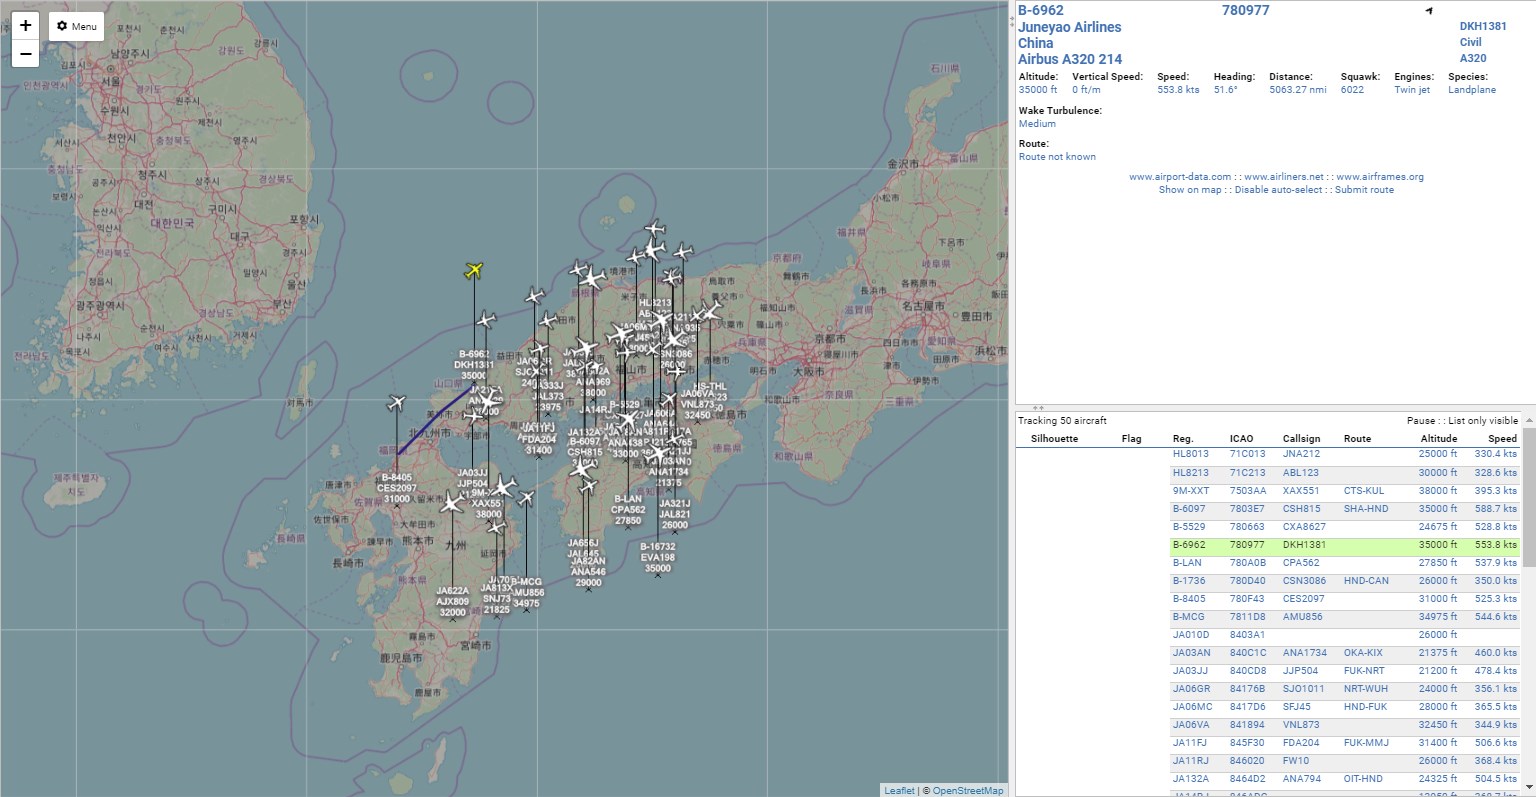
こんな画面が開くはずです。
まとめ
以上のようにModeSDeco2とVRSをいったん導入したのですが,PiAwareの方がいいよと言われて変えました。
その内容については下記記事のとおりです。
お知らせ
現在周波数情報を新サイトに移行中です。こちらもぜひ訪ねていただければと思います。
コメント